

interfaces(5) file used by ifup(8) and ifdown(8)
How to configure a static IP address on an Ubuntu 18.04 server. Static IP setup using DHCP and Netplan, available on updated devices.

How to configure a static IP address on Ubuntu 18.04 Bionic Beaver Linux
Configuring the static IP address via DHCP
Your current Ubuntu system most likely uses a DHCP server to configure its network settings, which means your IP address configuration is dynamic. In many scenarios, simply configuring the router or the local DHCP server is the preferred way to set a static address on any host, regardless of the operating system in use. Check your router's manual and assign the static IP address to the host based on its MAC address using the DHCP service.
Configuring the static IP address with Netplan
Netplan network configuration was first introduced in Ubuntu 18.04 LTS Bionic Beaver. It's available on all new Ubuntu 18.04 installations.
Depending on how Ubuntu was installed, Netplan may not be available on already-updated Ubuntu systems. If that's your case, you can try configuring a static IP address for your network interface using the /etc/network/interfaces file, as described at the end of this article.
Ubuntu Server
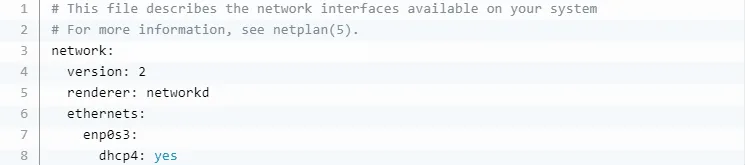
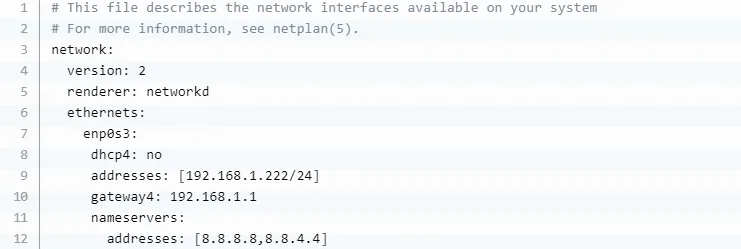
To configure a static IP address on your Ubuntu 18.04 server, you need to edit a netplan network configuration file inside the /etc/netplan/ directory.
For example, you might find a default netplan configuration file called 01-netcfg.yaml or 50-cloud-init.yaml with content that instructs the networkd daemon to configure your network interface via DHCP:
To set the enp0s3 network interface to a static IP address of 192.168.1.222 with gateway 192.168.1.1 and DNS servers 8.8.8.8 and 8.8.4.4, replace the configuration above with the one shown below.
Note: you must use correct indentation for every line of the block. In other words, the number of leading spaces on each line matters. Otherwise you may end up with an error message similar to: invalid YAML in //etc/netplan/01-netcfg.yaml line 7 column 6: did not find expected key
Once you're ready, apply the changes with:
Apply with $ sudo netplan If you run into any issues, run:
$ sudo netplan --debug apply
Ubuntu Desktop
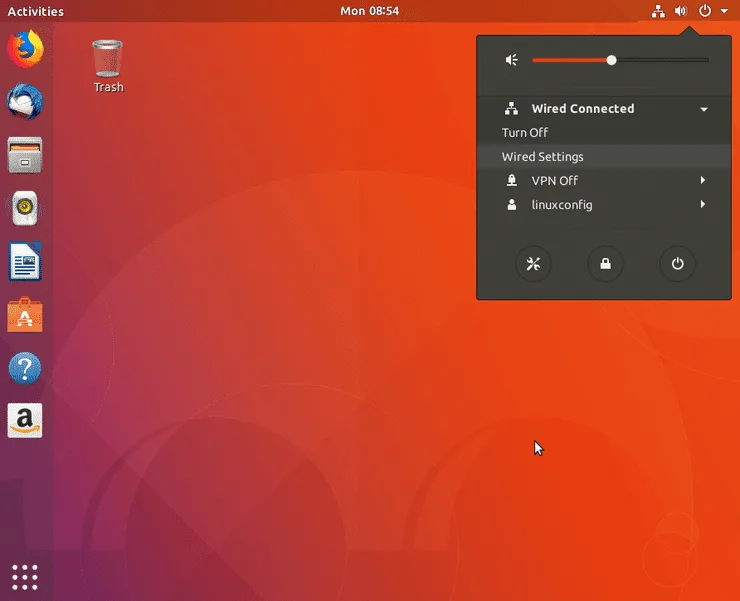
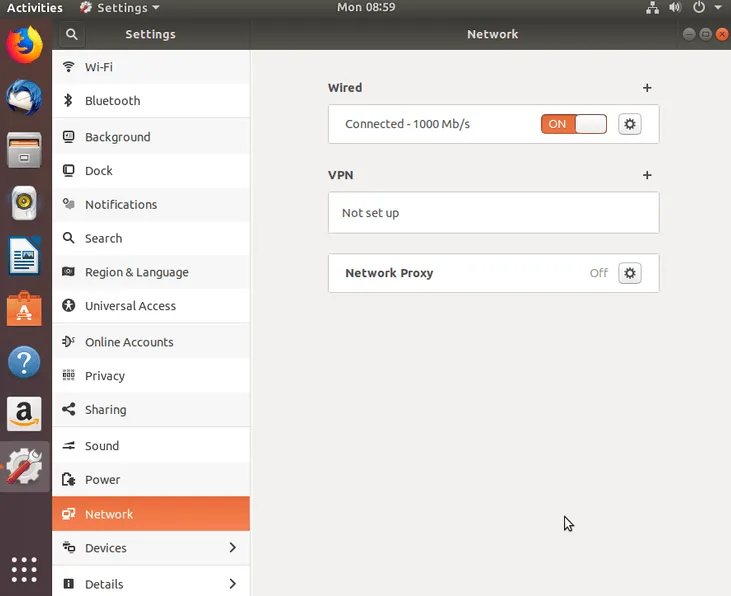
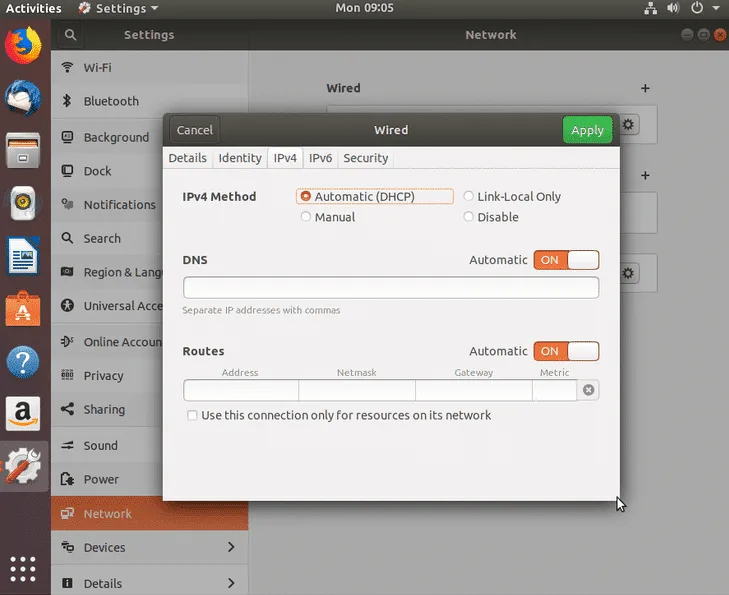
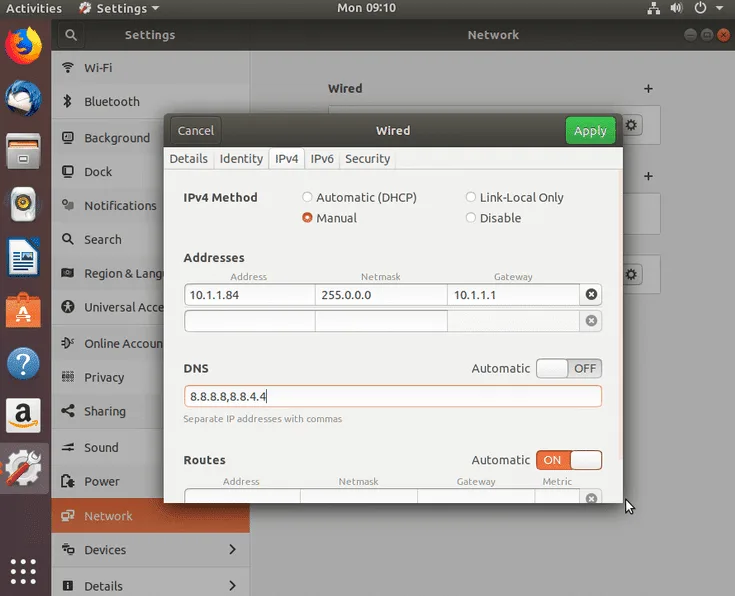
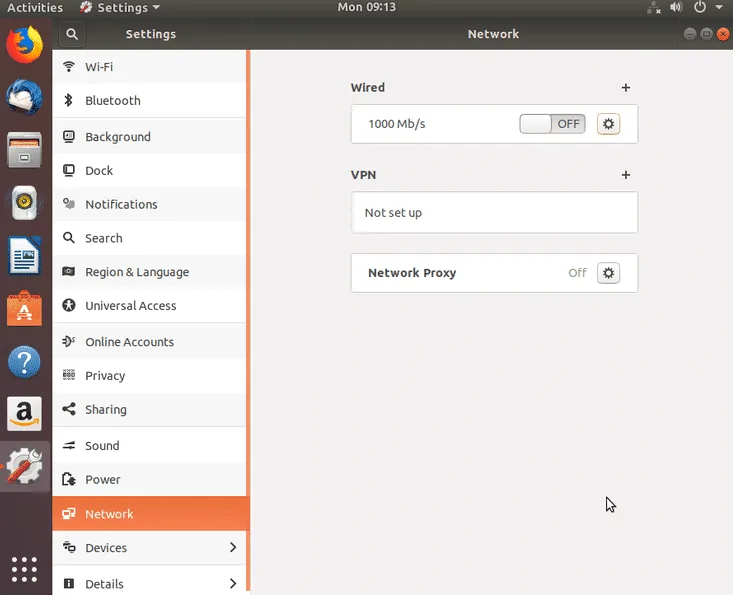
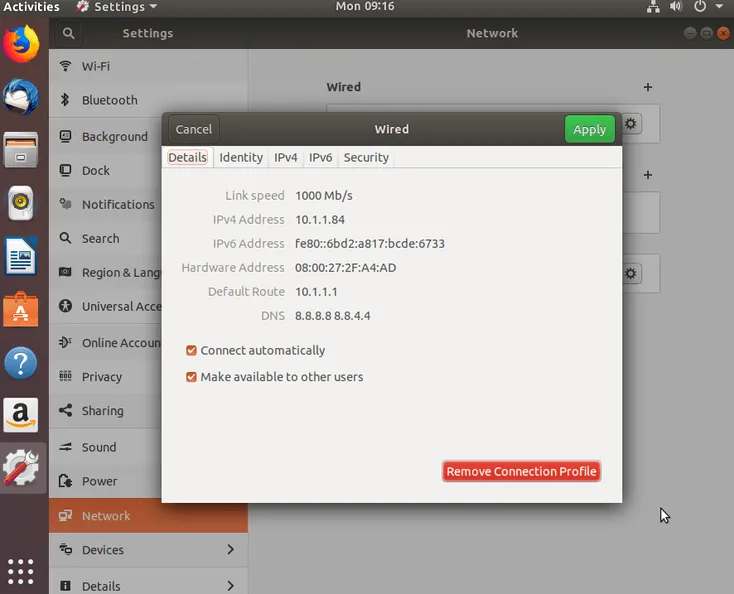
This is the preferred way to set a static IP address on Ubuntu Desktop.
Click the network icon in the top-right corner and select the settings for the network interface you want to assign a static IP address to.
Then click the gear icon next to the network connection you want to configure. This could be a wired or wireless connection.
Select IPv4 from the main menu.
Select Manual for the IPv4 settings, enter the configuration you want, and click Apply.
Restart the network using the ON/OFF switch.
Check the new static IP address configuration.
Configuring the static IP address using the interfaces file

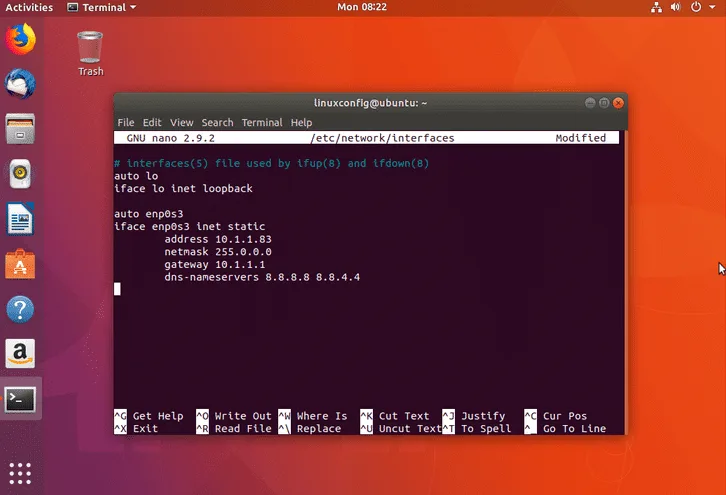
The following procedure is mostly obsolete on Ubuntu 18.04 systems that ship with Netplan pre-installed. That said, some Ubuntu 18.04 upgrades may still need to use /etc/network/interfaces to configure a static IP address on Ubuntu Server or Desktop systems. The /etc/network/interfaces file most likely currently contains the following lines:
# interfaces(5) file used by ifup(8) and ifdown(8)
auto lo
iface lo inet loopback
To configure the static IP address, we first need to know the name of the network interface we want to assign the static IP address to. Use one of the following commands to list all available network interface names:
$ ip a
# or
$ ip link show
1: lo: mtu 65536 qdisc noqueue state UNKNOWN mode DEFAULT group default qlen 1000
    link/loopback 00:00:00:00:00:00 brd 00:00:00:00:00:00
2: enp0s3: mtu 1500 qdisc fq_codel state UP mode DEFAULT group default qlen 1000
    link/ether 08:00:27:2f:a4:ad brd ff:ff:ff:ff:ff:ff
The network interface we want to configure with the static IP address is enp0s3. Use your preferred command-line text editor to edit the following content into the existing /etc/network/interfaces file, replacing the example configuration settings with the ones that fit your needs:
On line 1 we enable our network interface. Line 2 tells the system to use a static IP address. Line 3 declares the actual static IP address to assign to the enp0s3 interface. On line 4 we configure the netmask, and line 5 is used to set a gateway IP address. Optionally, on line 6 we can set one or more preferred DNS server addresses. Here's the resulting example /etc/network/interfaces file:
$ sudo nano /etc/network/interfaces
Save the /etc/network/interfaces file and restart the system, or restart networking using the following Linux commands, to apply the new settings:
$ sudo ip a flush enp0s3 $ sudo systemctl restart networking.service
Check the IP address configuration to confirm your new settings are correct.
Related Service: Linux Server Support
If this configuration is for a production server, our system support service covers networking, hardening and ongoing maintenance, while anyone who wants a ready-to-use environment can consider a Linux virtual server already sized and managed for them.
Frequently asked questions
How do you configure a static IP on Ubuntu 18.04?
Edit the Netplan configuration file inside /etc/netplan/ (for example 01-netcfg.yaml), set the address, gateway and DNS servers for the interface, then apply the changes with the command sudo netplan apply.
What is Netplan?
It's the network configuration system introduced in Ubuntu 18.04 LTS Bionic Beaver, replacing the older /etc/network/interfaces file as the standard way to manage network interfaces on newer Ubuntu installations.
How do you apply changes made to a Netplan file?
With the command sudo netplan apply. If you run into errors, use sudo netplan --debug apply instead, which prints a more detailed breakdown of exactly what went wrong.
How do you set a static IP on Ubuntu Desktop through the graphical interface?
Click the network icon, select the interface you want to configure, choose IPv4 then Manual, enter the address, gateway and DNS, click Apply, and finally restart the network connection.
How do you configure a static IP using the /etc/network/interfaces file?
Edit the file to specify the interface name, the static IP address, the netmask, the gateway and the DNS servers, then restart networking with sudo systemctl restart networking.service to apply it.
Technology partners






Want to discuss it with our team?
We analyse your infrastructure for free and propose the most suitable solution.